Executing JMeter Tests in an Azure Pipeline

Visual Studio Load Testing tools have been deprecated, along with Cloud Load Testing. In this post I investigate how to use JMeter as a load testing alternative.
Microsoft have deprecated Load Testing in Visual Studio. Along with this, they have also deprecated the cloud load testing capability in Azure/Azure DevOps. On the official alternatives document, several alternative load testing tools and platforms are mentioned, including JMeter. What is not clear from this page is how exactly you’re supposed to integrate JMeter into your pipelines.
I have a demo that shows how you can use Application Insights to provide business telemetry. In the demo, I update a website (PartsUnlimited) and then use traffic routing to route 20% of traffic to a canary slot. To simulate traffic, I run a cloud load test. Unfortunately, I won’t be able to use that for much longer since the cloud load test functionality will end of life soon! I set about figuring out how to run this test using JMeter.
JMeter tests can be run on a platform called BlazeMeter. BlazeMeter has integration with Azure DevOps. However, I wanted to see if I could get a solution that didn’t require a subscription service.
The Solution
JMeter is a Java-based application. I’m not a big fan of Java – even though I authored a lot of the Java Hands on Labs for Azure DevOps! I had to install the JRE on my machine in order to open the JMeter GUI so that I could author my test. However, I didn’t want to have to install Java or JMeter on the build agent – so of course I looked to Docker. And it turns out that you can run JMeter tests in a Docker container pretty easily!
To summarize the solution:
- Create your JMeter test plans (and supporting files like CSV files) and put them into a folder in your repo
- Create a “run.sh” file that launches the Docker image and runs the tests
- Create a “test.sh” file for each JMeter test plan – this just calls “run.sh” passing in the test plan and any parameters
- Publish the “reports” directory for post-run analysis
I’ve created a GitHub repo that has the source code for this example.
Test Plan Considerations
I won’t go over recording and creating a JMeter test in this post – I assume that you have a JMeter test ready to go. I do, however, want to discuss parameters and data files.
It’s common to have some parameters for your test plans. For example, you may want to run the same test plan against multiple sites – DEV or STAGING for example. In this case you can specify a parameter called “host” that you can specify when you run the test. To access parameters in JMeter, you have to use the parameter function, “__P”. JMeter distinguishes between parameters and variables, so you can have both a variable and a parameter of the same name.
In the figure below, I have a test plan called CartTest.jmx where I specify a User Defined Variable (UDV) called “host”. I use the parameter function to read the parameter value if it exists, or default to “cdpartsun2-prod.azurewebsites.net” if the parameter does not exist:
The value of the host UDV is “${__P(host,cdpartsun2-prod.azurewebsites.net)}”. Of course you can use the __P function wherever you need it – not just for UDVs.
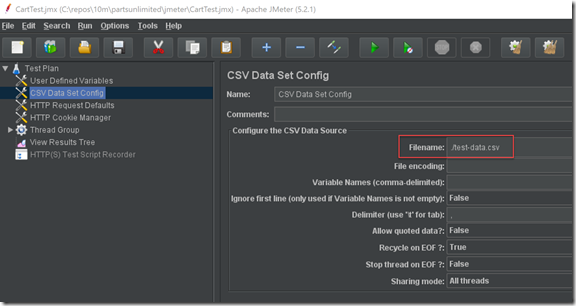
In my test plan, I also have a CSV for test data. I set the path of this file as a relative path to the JMX file:
Now that I have the test plan and supporting data files, I am ready to script test execution. Before we get to running the test in a container, let’s see how I can run the test from the command line. I simply execute this command from within the folder containing the JMX file: jmeter -n -t CartTest.jmx -l results.jtl -Jhost=cdpartsun2-dev.azurewebsites.net –j jmeter.log –e –o reports
Notes:
- -n tells JMeter to run in non-GUI mode
- -t specifies the path to the test plan
- -l specifies the path to output results to
- -J<name>=<value> is how I pass in parameters; there may be multiple of these
- -j specifies the path to the log file
- -e specifies that JMeter should produce a report
- -o specifies the report folder location
We now have all the pieces to script this into a pipeline! Let’s encapsulate some of this logic into two scripts: “run.sh” which will launch a Docker container and execute a test plan, and “test.sh” that is a wrapper for executing the CartTest.jmx file.
run.sh
I based this script off this GitHub repo by Just van den Broecke.
    #!/bin/bash
    #
    # Run JMeter Docker image with options

    NAME="jmetertest"
    IMAGE="justb4/jmeter:latest"
    ROOTPATH=$1

    echo "$ROOTPATH"
    # Finally run
    docker stop $NAME > /dev/null 2>&1
    docker rm $NAME > /dev/null 2>&1
    docker run --name $NAME -i -v $ROOTPATH:/test -w /test $IMAGE ${@:2}
Notes:
- The NAME variable is the name of the container instance
- The IMAGE is the container image to launch – in this case “justb4/jmeter:latest” – this container includes Java and JMeter, as well as an entrypoint that launches a JMeter test
- ROOTPATH is the first arg to the script and is the path that contains the JMeter test plan and data files
- The script stops any running instance of the container, and then deletes it
- The final line of the script runs a new instance of the container, mapping a volume from “ROOTPATH” on the host machine to a folder in the container called “/test” and then passes in remaining parameters (skipping ROOTPATH) as arguments to the entrypoint of the script. These are the JMeter test arguments.
test.sh
Now we have a generic way to launch the container, map the files and run the tests. Let’s wrap this call into a script for executing the CartTest.jmx test plan:
    #!/bin/bash
    #
    rootPath=$1
    testFile=$2
    host=$3

    echo "Root path: $rootPath"
    echo "Test file: $testFile"
    echo "Host: $host"

    T_DIR=.

    # Reporting dir: start fresh
    R_DIR=$T_DIR/report
    rm -rf $R_DIR > /dev/null 2>&1
    mkdir -p $R_DIR

    rm -f $T_DIR/test-plan.jtl $T_DIR/jmeter.log > /dev/null 2>&1

    ./run.sh $rootPath -Dlog_level.jmeter=DEBUG \
    	-Jhost=$host \
    	-n -t /test/$testFile -l $T_DIR/test-plan.jtl -j $T_DIR/jmeter.log \
    	-e -o $R_DIR

    echo "==== jmeter.log ===="
    cat $T_DIR/jmeter.log

    echo "==== Raw Test Report ===="
    cat $T_DIR/test-plan.jtl

    echo "==== HTML Test Report ===="
    echo "See HTML test report in $R_DIR/index.html"
Notes:
- Lines 3-5: We need 3 args: the rootPath on the host containing the test plan, the name of the test plan (the jmx file) and a host parameter, which is specific to this test plan
- Line 9: set the T_DIR to the current directory
- Lines 14-16: Create a report directory, cleaning it if it exists already
- Line 18: Clear previous result files
- Lines 20-23: Call run.sh, passing in the rootPath and all the other JMeter args and parameters we need to invoke the test
- Lines 22-29: Echo the location of the log, raw report and HTML reports
As long as we have Docker, we can run the script and we don’t need to install Java or JMeter!
We can execute the test from bash like so:
./test.sh $PWD CartTest.jmx cdpartsun2-dev.azurewebsites.net
WSL Gotcha
One caveat for Windows Subsystem for Linux (WSL): $PWD will not work for the volume mapping. This is because Docker for Windows is running on Windows, while the WSL paths are mounted in the Linux subsystem. In my case, the folder in WSL is “/mnt/c/repos/10m/partsunlimited/jmeter”, while the folder in Windows is “c:\repos\10m\partsunlimited\jmeter”. It took me a while to figure this out – the volume mapping works, but the volume is always empty. To work around this, just pass in the Windows path instead:
./test.sh 'C:\repos\10m\partsunlimited\jmeter' CartTest.jmx cdpartsun2-dev.azurewebsites.net
Executing from a Pipeline
We’ve done most of the hard work – now we can put the script into a pipeline. We need to execute the test script with the correct arguments and upload the test results and we’re done! Here’s the pipeline:
    variables:
      host: cdpartsun2-dev.azurewebsites.net

    jobs:
    - job: jmeter
      pool:
        vmImage: ubuntu-latest
      displayName: Run JMeter tests
      steps:
      - task: Bash@3
        displayName: Execute JMeter tests
        inputs:
          targetType: filePath
          filePath: 'jmeter/test.sh'
          arguments: '$PWD CartTest.jmx $(host)'
          workingDirectory: jmeter
          failOnStderr: true
      - task: PublishPipelineArtifact@1
        displayName: Publish JMeter Report
        inputs:
          targetPath: jmeter/report
          artifact: jmeter
This is very simple – and we don’t even have to worry about installing Java or JMeter – the only prerequisite we have is that the agent is able to run Docker containers! The first step executes the test.sh script, passing in the arguments just like we did from in the console. The second task publishes the report folder so that we can analyze the run.
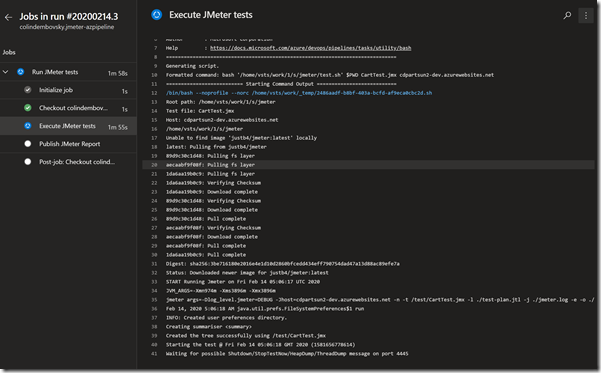
Here’s a snippet of the log while the test is executing: we can see the download of the Docker image and the boot up – now we just wait for the test to complete.
Executable Attributes
One quick note: initially when I committed the scripts to the repo, they didn’t have the executable attribute set – this caused the build to fail because the scripts were not executable. To set the executable attribute, I ran the following command in the folder containing the sh files: git update-index --chmod=+x test.sh git update-index --chmod=+x run.sh
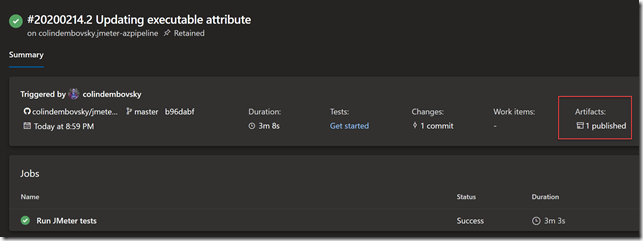
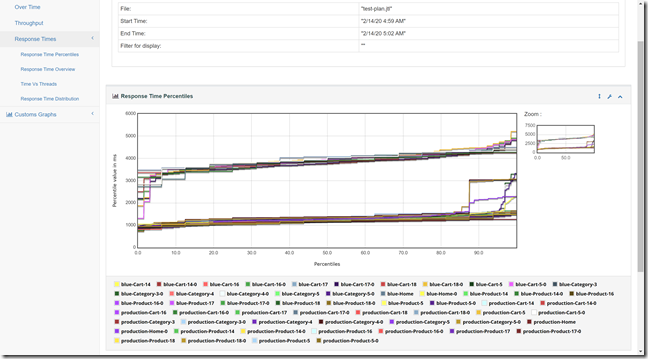
Once the build completes, we can download the report file and analyze the test run:
Conclusion
Once you have a JMeter test, it’s fairly simple to run the it in a Docker container as part of your build (or release) process. Of course this doesn’t test load from multiple locations and is limited to the amount of threads the agent can spin up, but for quick performance metrics it’s a clean and easy way to execute load tests. Add to that the powerful GUI authoring capabilities of JMeter and you have a good performance testing platform.
Happy load testing!


