Easy Config Management when Deploying Azure Web Apps from VSTS

A good DevOps pipeline should utilize the principle of build once, deploy many times. In fact, I’d go so far as to say it’s essential for a good DevOps pipeline. That means that you have to have a way to manage your configuration in such a way that the package coming out of the build process is tokenized somehow so that when you release to different environments you can inject environment-specific values. Easier said that done – until now.
Doing it the Right but Hard Way
Currently I’ve recommended that you use WebDeploy to do this. You define a publish profile to handle connection string and a parameters.xml file to handle any other config you want to tokenize during build. This produces a WebDeploy zip file along with a (now tokenized) SetParameters.xml file. Then you use the ReplaceTokens task from my VSTS build/release task pack extension and inject the environment values into the SetParameters.xml file before invoking WebDeploy. This works, but it’s complicated. You can read a full end to end walkthrough in this post.
Doing it the Easy Way
A recent release to the Azure Web App deploy task in VSTS has just dramatically simplified the process! No need for parameters.xml or publish profiles at all.
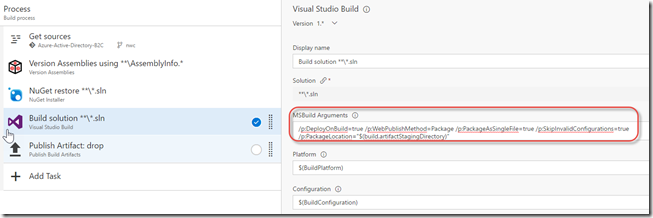
Make sure your build is producing a WebDeploy zip file. You can read my end to end post on how to add the build arguments to the VS Build task – but now you don’t have to specify a publish profile. You also don’t need a parameters.xml in the solution. The resulting zip file will deploy (by default) with whatever values you have in the web.config at build time.
Here’s what I recommend: /p:DeployOnBuild=true /p:WebPublishMethod=Package /p:PackageAsSingleFile=true /p:SkipInvalidConfigurations=true /p:PackageLocation="$(build.artifactStagingDirectory)"
You can now just paste that into the build task:
You can see the args (in the new build UI). This tells VS to create the WebDeploy zip and put it into the artifact staging directory. The Publish Artifact Drop task uploads anything that it’s the artifact staging directory (again, by default) – which at the time it runs should be the WebDeploy files.
The Release
Here’s where the magic comes in: drop in an Azure App Service Deploy task. Set it’s version to 3.*(preview). You’ll see a new section called “File Transforms & Variable Substitution Options”. Just enable the “XML Override substitution”.
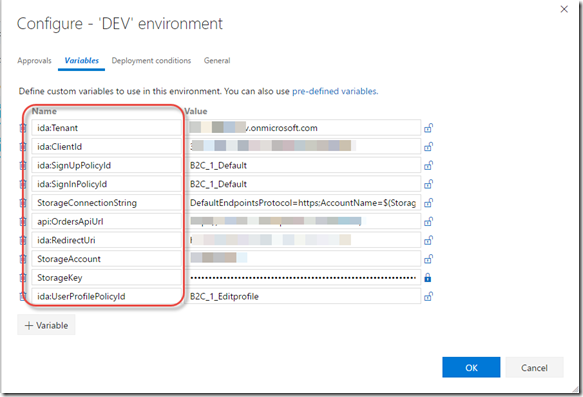
That’s it! Except for defining the values we want to use for the said substitution. To do this, open the web.config and look at your app setting keys or connection string names. Create a variable that matches the name of the setting and enter a value. In my example, I have Azure B2C so I need a key called “ida:Tenant” so I just created a variable with that name and set the value for the DEV environment. I did the same for the other web.config variables:
Now you can run your release!
Checking the Web.Config Using Kudu
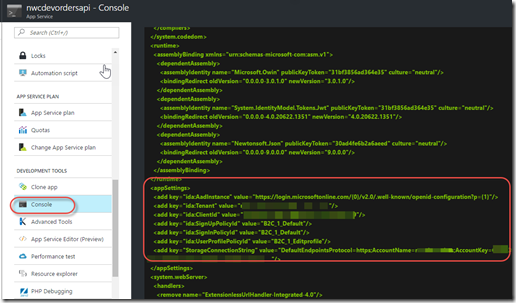
Once the release had completed, I wanted to check if the value had been set. I opened up the web app in the Azure portal, but there were no app settings defined there. I suppose that makes sense – the substitutions are made onto the web.config itself. So I just opened the Kudu console for the web app and cat’ed the web.config by typing “cat Web.config”. I could see that the environment values had been injected!
Conclusion
It’s finally become easy to manage web configs using the VSTS Azure Web App Deploy task. No more publish profiles, parameters.xml files, SetParameters.xml files or token replacement. It’s refreshingly clean and simple. Good job VSTS team!
I did note that there is also the possibility of injecting environment-specific values into a json file – so if you have .NET CORE apps, you can easily inject values at deploy time.
Happy releasing!


